Create a Gmail Account in Less Than 3 Minutes
Setting up a Gmail account is one of the easiest and smartest ways to connect to the digital world. Whether you’re looking for a personal email, a business-focused Gmail account, or even a custom Gmail for work setup, Google makes the process simple.
But easy doesn’t mean trivial. By understanding and following this guide, you’ll unlock a wealth of features to improve your productivity and secure your communication.
Learn how to create a Gmail account in under 3 minutes.
Why Gmail is a Must-Have Tool
Gmail is more than just an email service – it’s a gateway into Google’s powerful ecosystem. Imagine managing everything from documents to meetings in one place, and doing it with convenience.
What makes Gmail shine?
- Seamless integration: Tools like Google Drive, Google Docs, and Google Meet work flawlessly with Gmail.
- Robust security: Protect sensitive data with two-step verification and advanced filters.
- Custom options for businesses: Want a professional touch? Google Workspace allows you to create Gmail business email addresses like [email protected].
With over 1.8 billion users daily, Gmail is an industry leader, and for good reason.
Step-by-Step Guide to Creating Your Gmail Account
Follow these 6 simple steps, and in no time, you’ll have your very own Gmail address up and running.
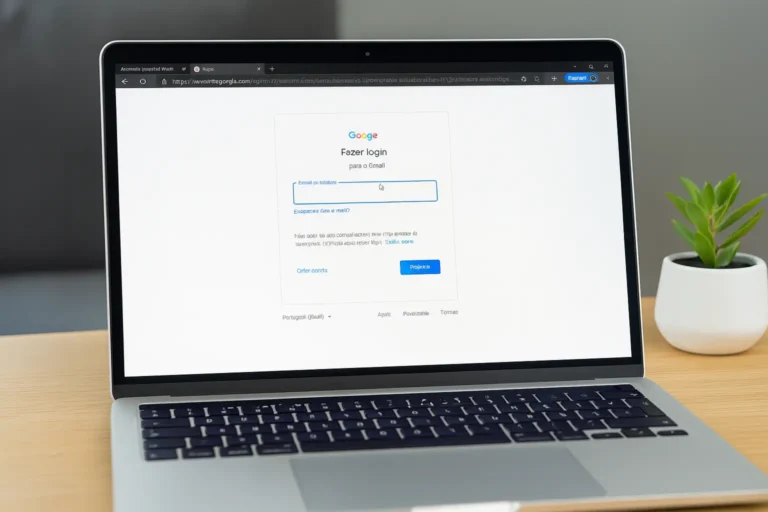
Step 1: Visit the Gmail website
- Open your web browser.
- Go to accounts.google.com.
- Hit “Create account” to launch the setup wizard.
Step 2: Select the Account Type
- For me: Perfect for personal use.
- For work or business: This is your starting point to create a Google Workspace account or a professional Gmail business email.
Step 3: Enter Your Personal Details
- Fill in details like your First Name, Last Name, and desired Username (e.g., [email protected]).
- Pro Tip! If your ideal username isn’t available, try adding numbers or creative variations to make it unique.
Step 4: Set a Strong Password
- Pick a secure password with a mix of uppercase letters, numbers, and symbols.
- Aim for 8+ characters.
- Example of a strong password? Tiger$2024.
- Don’t reuse passwords from other accounts to prevent unauthorized access.
Step 5: Complete Verification
- Enter your phone number or an alternate email for recovery (highly recommended for added security).
- Receive and input the verification code sent to confirm your identity.
Step 6: Agree to Google’s Terms
- Take a moment to read Google’s policies.
- Check the box and hit “I agree” to unlock your Gmail account!
Voilà! Your Gmail account is now active and ready.
Make Your Gmail Work for You
Thinking about using Gmail for business purposes? Here’s where it gets exciting.
Elevate to Gmail for Business
To keep things professional, consider Google Workspace. With this setup, you can customize your email to align with your brand. For example, instead of [email protected], you’ll have [email protected].
Why upgrade to Gmail for business?
- Custom branding: Use your domain for unique, professional email addresses.
- Team collaboration tools: Tap into features like shared calendars, Google Meet, and enhanced storage.
- Exclusive perks: Add email signatures, schedule emails, or track key metrics through Workspace tools.
Start your upgrade process by selecting “create Google business account” during your Gmail creation.
A Quick Troubleshooting Guide
Everyone hits a road bump occasionally, so here’s how you can quickly resolve it.
Username already taken?
- Try adding numbers (e.g., maria2023).
- Use a period to separate words (e.g., john.doe).
Forgot your password?
- Click “Forgot password” on the login screen and follow the recovery prompts.
Didn’t receive a verification code?
- Double-check your phone number or recovery email for typos.
- Resend the code if necessary.
Keep these solutions in mind, and you’ll breeze past any hurdles.
Tap into Gmail’s Features
After setting up your account, you’re only scratching the surface of Gmail’s capabilities. Here are feature highlights to explore.
1. Organize Like a Pro
- Use filters to sort emails automatically into folders like “Work” or “Personal.”
- Apply labels for easy retrieval, e.g., Invoices.
2. Sync Across Devices
- Install the Gmail app for both iOS and Android to access emails anytime, anywhere.
3. Increase Productivity
- Integrate Google Calendar to keep your meetings and schedules on point.
- Share documents seamlessly via Google Drive for team collaboration.
4. Leverage Tasting Notes (for Premium Users)
If you’re on Gmail Business Email, you’ll even have productivity insights built in, giving your team an edge.
You’ve Got Your Gmail Account!
Congratulations! You’ve now learned not just how to create a Gmail account but also how to maximize its potential. Gmail isn’t just an email service; it’s your all-in-one hub for communication, storage, and productivity tools.
Take the leap and create your account today to stay connected, organized, and secure!
Are you ready to boost your email game? Start exploring tools like Google Workspace or Gmail for work for even more functionality.

